
Track
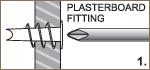 NOTE: It is recommended your track is secured to the wall by screwing into as many wall studs as possible. If it is not possible to line up with all available wall studs you can use plasterboard fittings (see illustration 1).
 NOTE: If using the Gallery System Clear Tape system, leave at least a 40mm gap between tracks for the hangers to be inserted into the end of the track.
 Fixing to Plasterboard Drill a 4mm hole in the centre of the length of track, using the V groove in the top of the track as a guide. Drill a hole at least 20mm from each end of the track and finally drill the remaining holes 400 to 500mm apart depending on the location of your wall studs. This configuration will result in at least five screws per 2m length and seven screws per 3m length.
Decide on the height at which you would like the track.
 IMPORTANT: If you plan to install our lighting system leave at least 15mm between the top of the track and ceiling to allow space to fit the light wand.
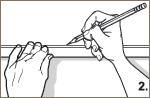
Mark with a pencil at intervals measuring down from the ceiling to ensure the track is level. Using the track as a ruler mark the wall with a pencil
(see illustration 2).
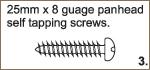
Mark the position of the centre hole on the wall, then tap a small nail into the plasterboard.
If it hits a wall stud, fix the track in place with a 25mm x 8 gauge pan head screw, (see illustration 3) if not, fit a plasterboard fitting first.
Mark the positions of the remaining holes. Remove the track and tap a nail into each marked position to check for studs. Screw in the plasterboard fittings where needed, and then screw the track to the wall.
 Fixing to Masonry IIt is often hard to drill holes into masonry accurately as the drill tends to move off target. Consequently, we suggest the following:
Predrill your track starting with a 5mm hole in the centre of the length of track. Next drill a hole at least 20mm from each end of the track and finally drill the remaining holes 400 to 500mm apart. This configuration will result in at least five screws per 2m length and seven screws per 3m length.
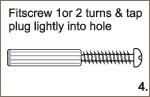
Decide on the height at which you would like to install the track and mark the wall with a marker pen or a scriber (see fixing to plasterboard) using the track as a ruler. Mark the position of the centre hole on the wall. Hold the track firmly in position on the wall and using the centre track hole as a guide, drill a 5mm hole through into the masonry. Drill 10mm deeper than the length of your wall plugs. Remove the track and fit the 5mm wall plug into the holes (see illustration 4). If it won’t go full depth the screw allows, remove the wall plug, redrill and try again.
Screw the track temporarily in place then, using the holes in the track as a guide, drill the remaining holes in the masonry. Unscrew the track and insert remaining wall plugs and screw the track to the wall.